
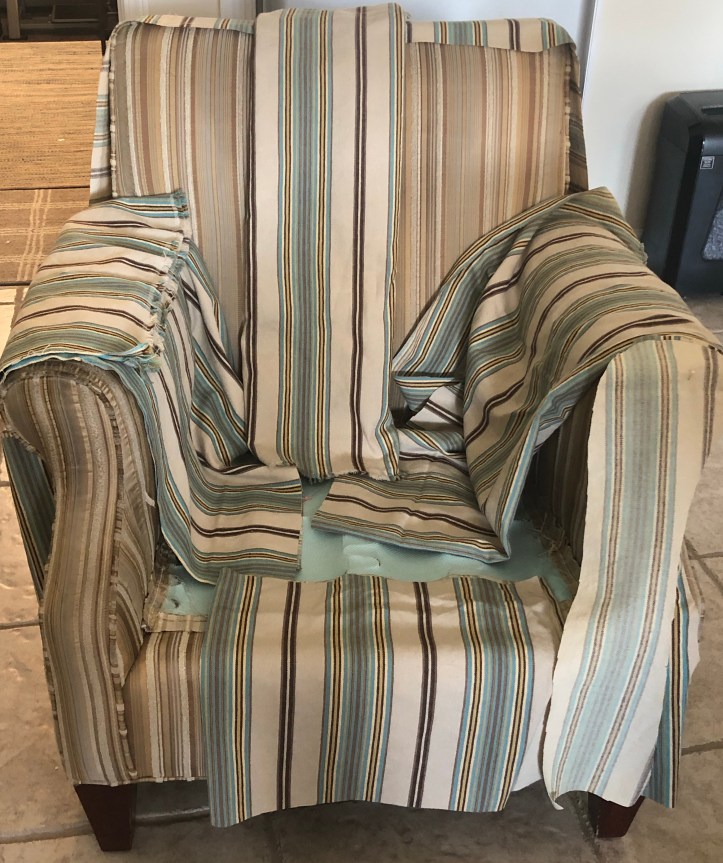
This chair was a fun challenge. I often have to ease my way into a chair….to get into the “zone”. I start this process by inspecting the fabric for flaws and design, making the cording, cutting the pieces for the chair, loading bobbins of thread, getting my tools gathered in the different work areas, writing out the steps I want to follow on a particular chair, making patterns of pieces of the chair that need it and finally starting with the cushions.
I like to do the cushion first because it is usually straightforward and an easy way to feel like I have accomplished something early on. It inspires me to keep going to finish and see the end result. It allows me to see the potential of the finished product. My adrenaline gets pumping.
My client has two of these chairs. The one featured in this post is being done in a striped fabric she picked up at an antique store that happened to sell random fabric. She had six pieces cut yardage that added up to 9 yards. It wouldn’t be enough to do both chairs so we decided to do one chair in the stripe and the second chair in a complimenting solid bull denim. I had them pre-wash the fabric and went to work.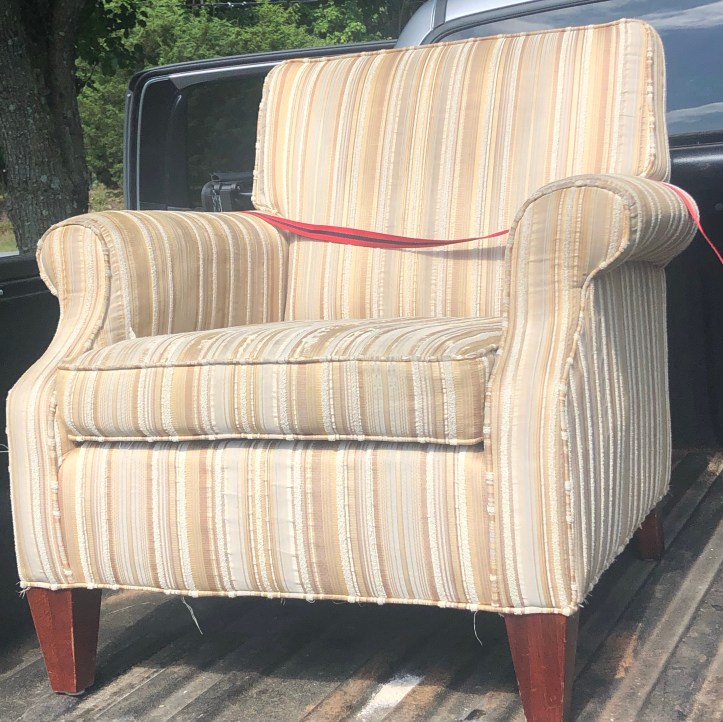
The original chair had an attached seat which was removed to make a separate cushion which she can flip to give it double the wear until it needs to be washed. Once I cut the cushion off, I needed to repair the seat deck as the only thing separating the springs from being exposed was a thin sheet of paper-like fabric. It reminded me of those disposable wash cloths Handi Wipes. I cut a 1/2″ thick bonded polyester cushion wrap piece to fit the space and sewed on a piece of deck fabric to the existing deck border.


I am so glad there was enough fabric to really pay attention to matching the stripes. It just wouldn’t look right if it couldn’t be done this way. The stripe flows from the back to the top panel to the front of the chair to the cushion and down the front deck of the chair effortlessly. I can assure you it took a little bit of effort to match the pattern and stripes up from top to bottom and from side to side.


I had one cut of fabric left. If you remember, part of my process is to inspect the fabric before getting started. In this case, I noticed that one of the cuts of fabric was slightly different than the rest. It is actually missing a stripe!
 I reserved this piece to use for areas that wouldn’t be seen if I needed to and planned to use it for the lumbar pillows she requested. I made one for this striped chair and one to put on the solid color chair that I will be making later this fall. It will be the perfect way to tie the two chairs together.


Until next time, stay safe.
Denise
